A Practical Use of a 3D Printer
A Practical Use of a 3D Printer
A few days ago, my Behringer X-Touch tipped off its stand and broke three of the encoder caps. After contacting support, and learning that they aren't shipping replacements for the near future, I came up with a 3D printed design to temporarily fill the void!
Here's the damage:

And the pieces that broke off:
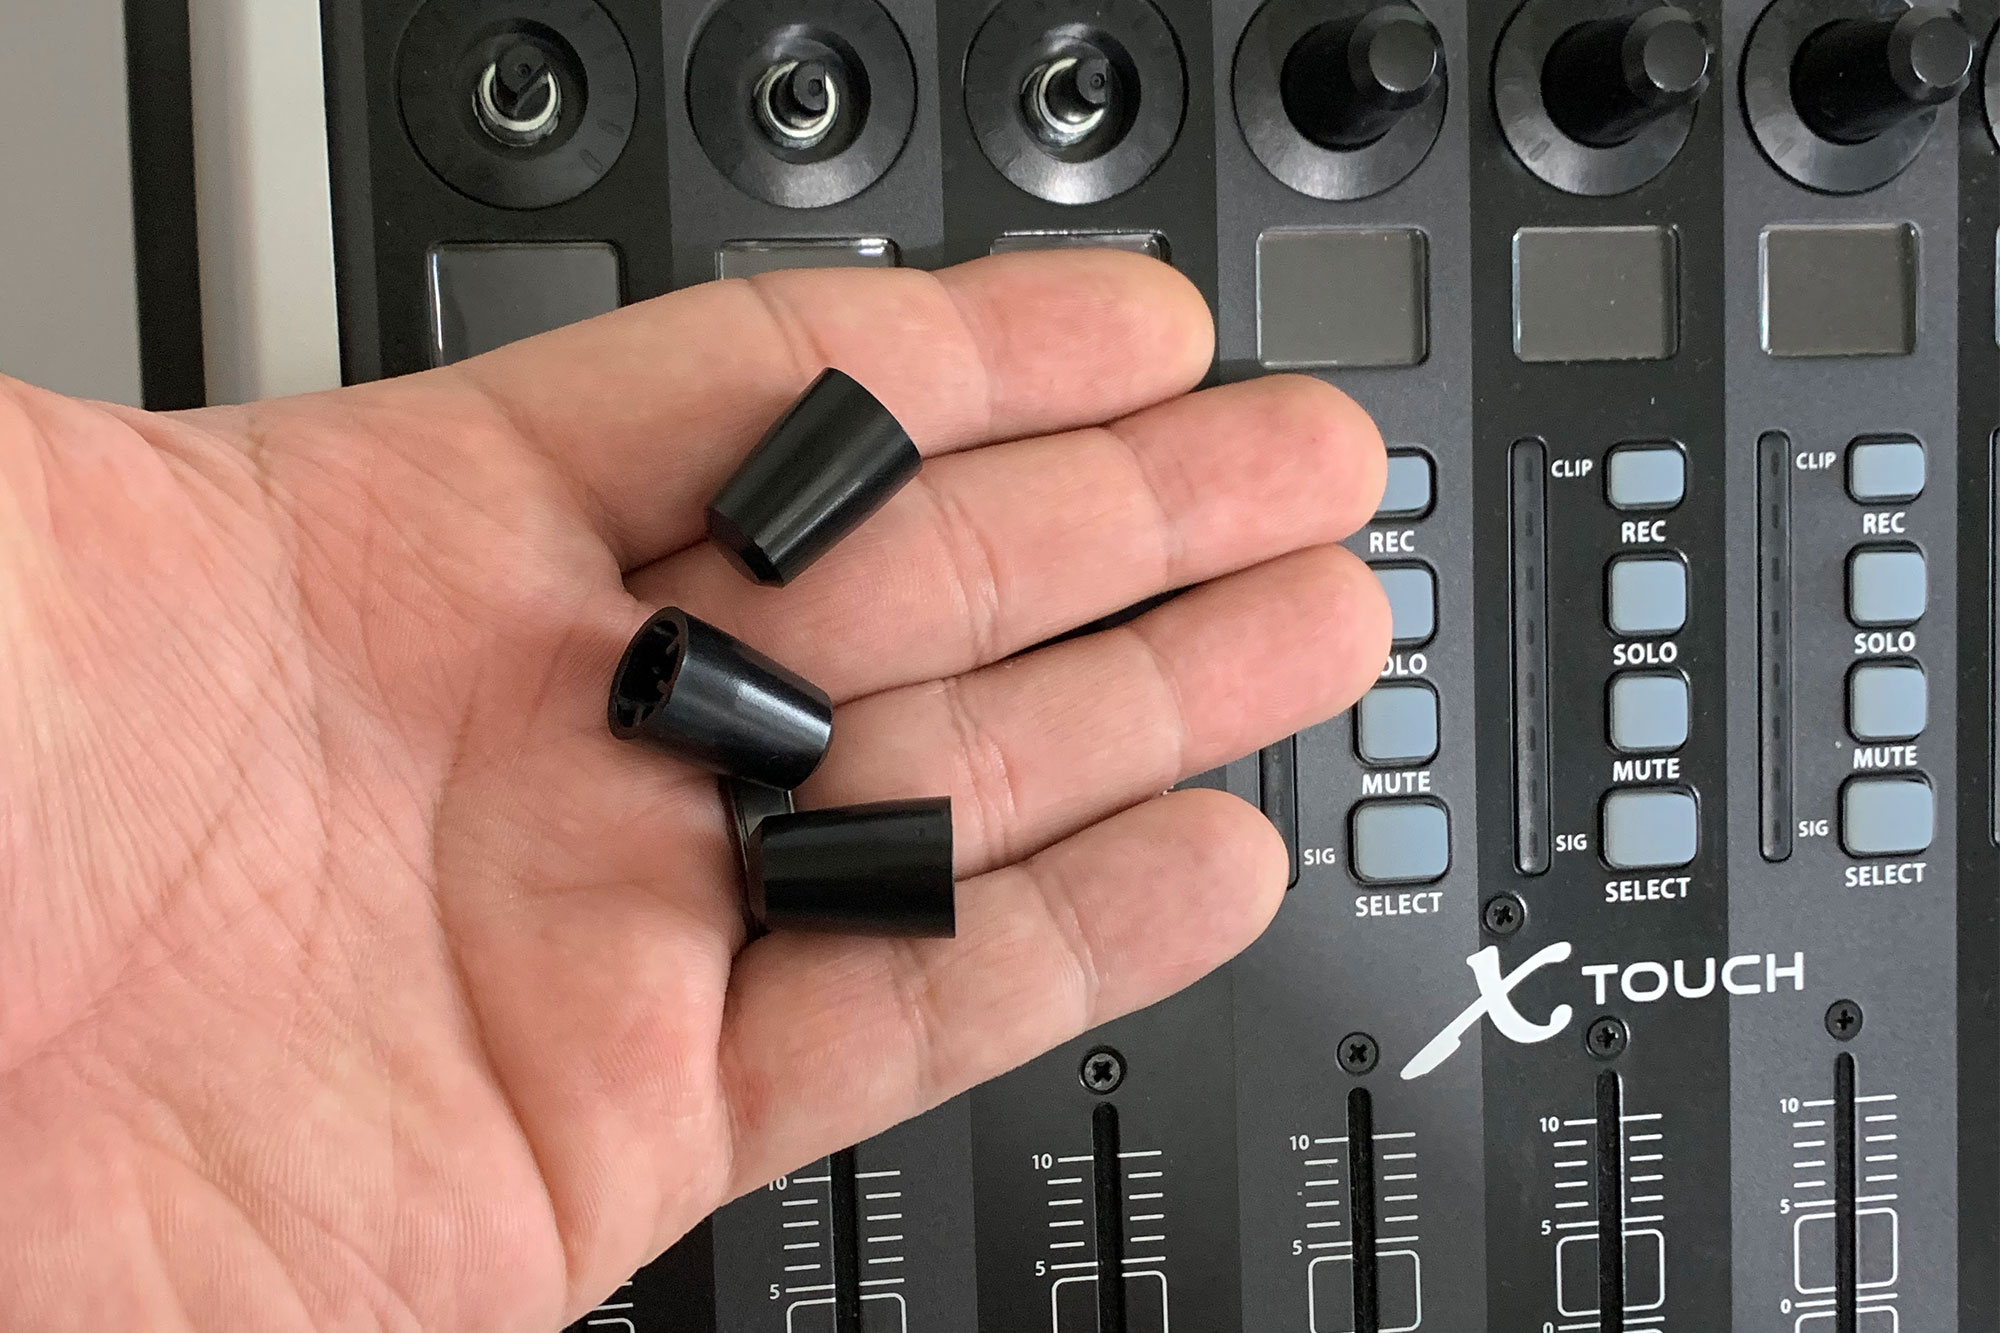
There are small plastic pieces that hold the encoder caps on the actual encoder; those are the pieces that snapped internally hindering me from actually using the encoder. Sadly, I forgot to take a picture of the inside.
After taking measurements with my calipers, I put together a draft design in Fusion 360. I wanted something that would print quickly, and could help me check my measurements. Here's my first revision:
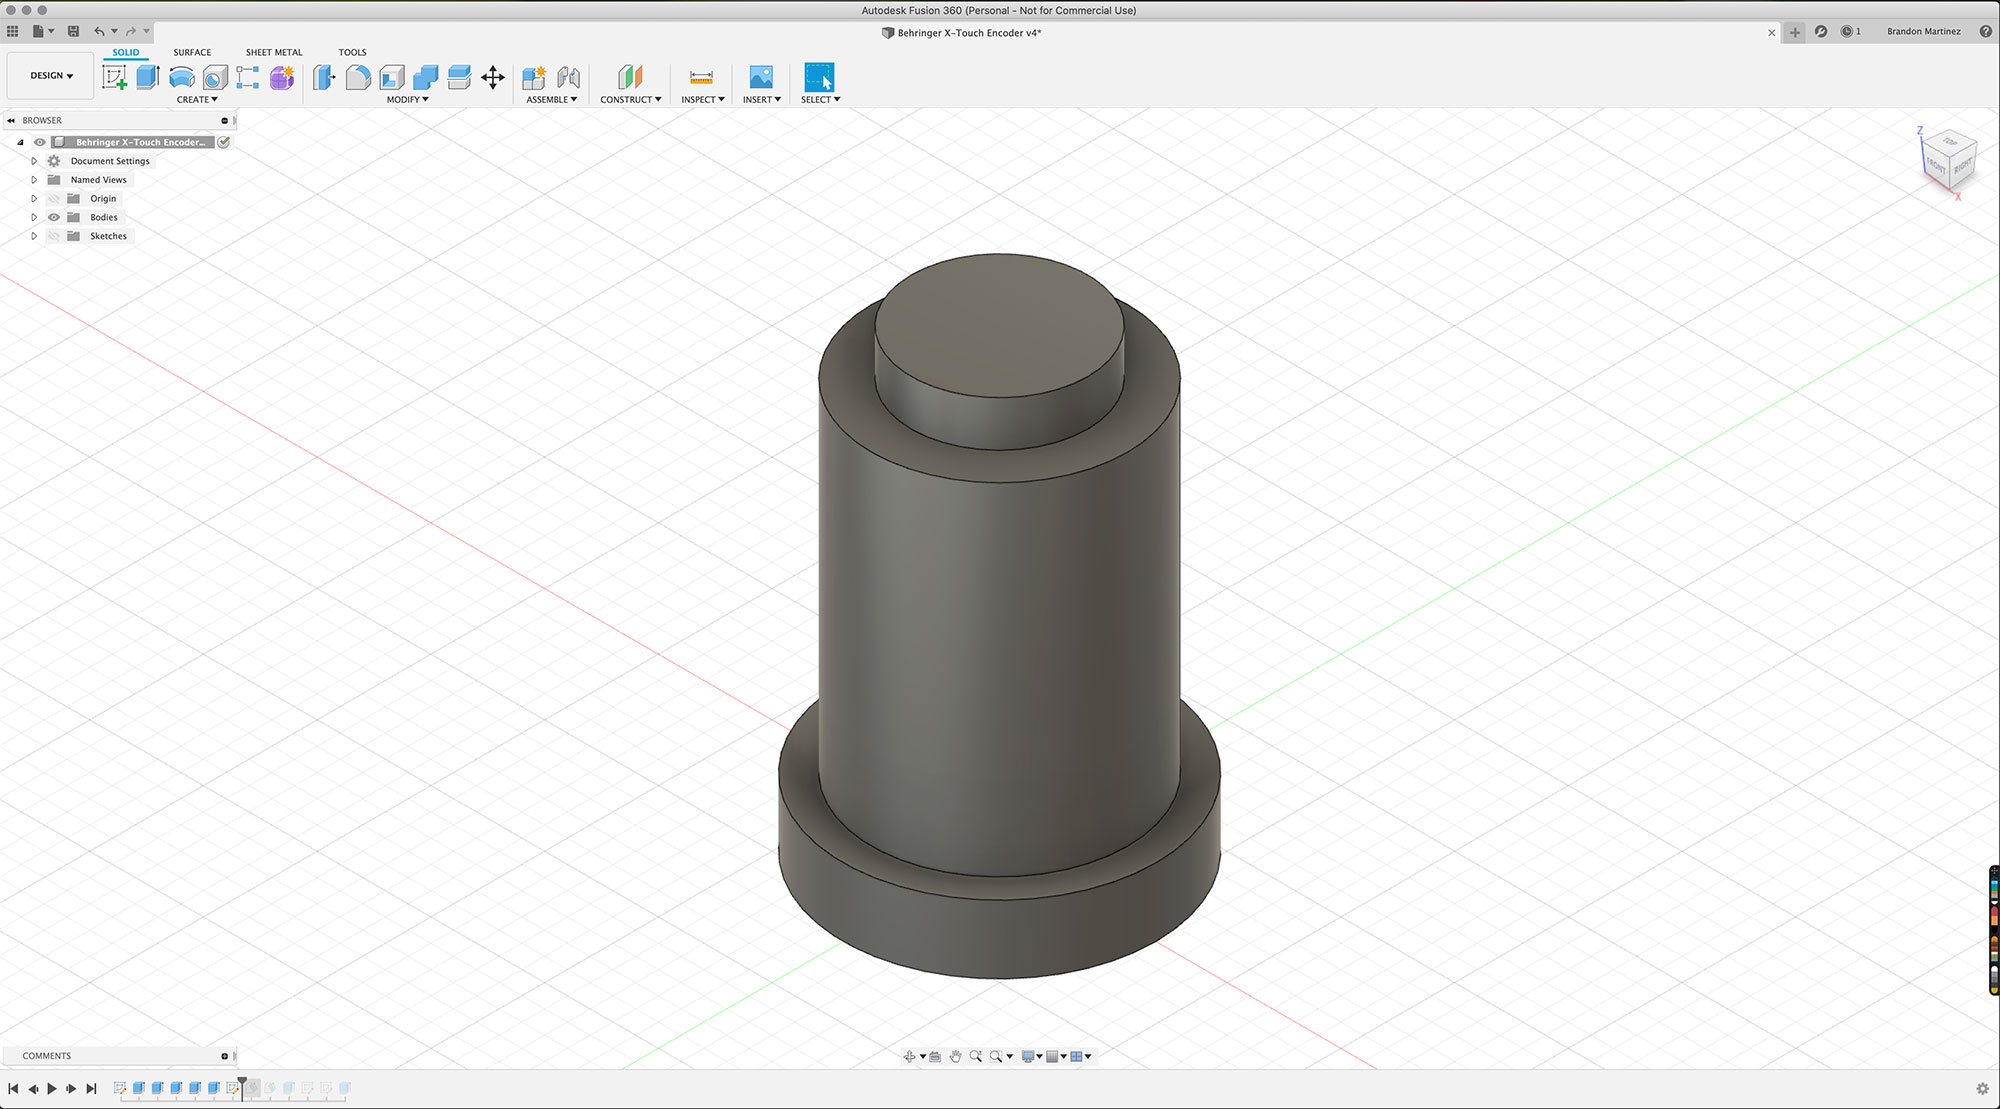
This design only took 25 minutes to print; I was able to quickly test and see I was within a millimeter of fitting on the encoder knob.

After testing that design, I made some modifications to correct my measurements and to get closer to the actual design of the original encoder caps.
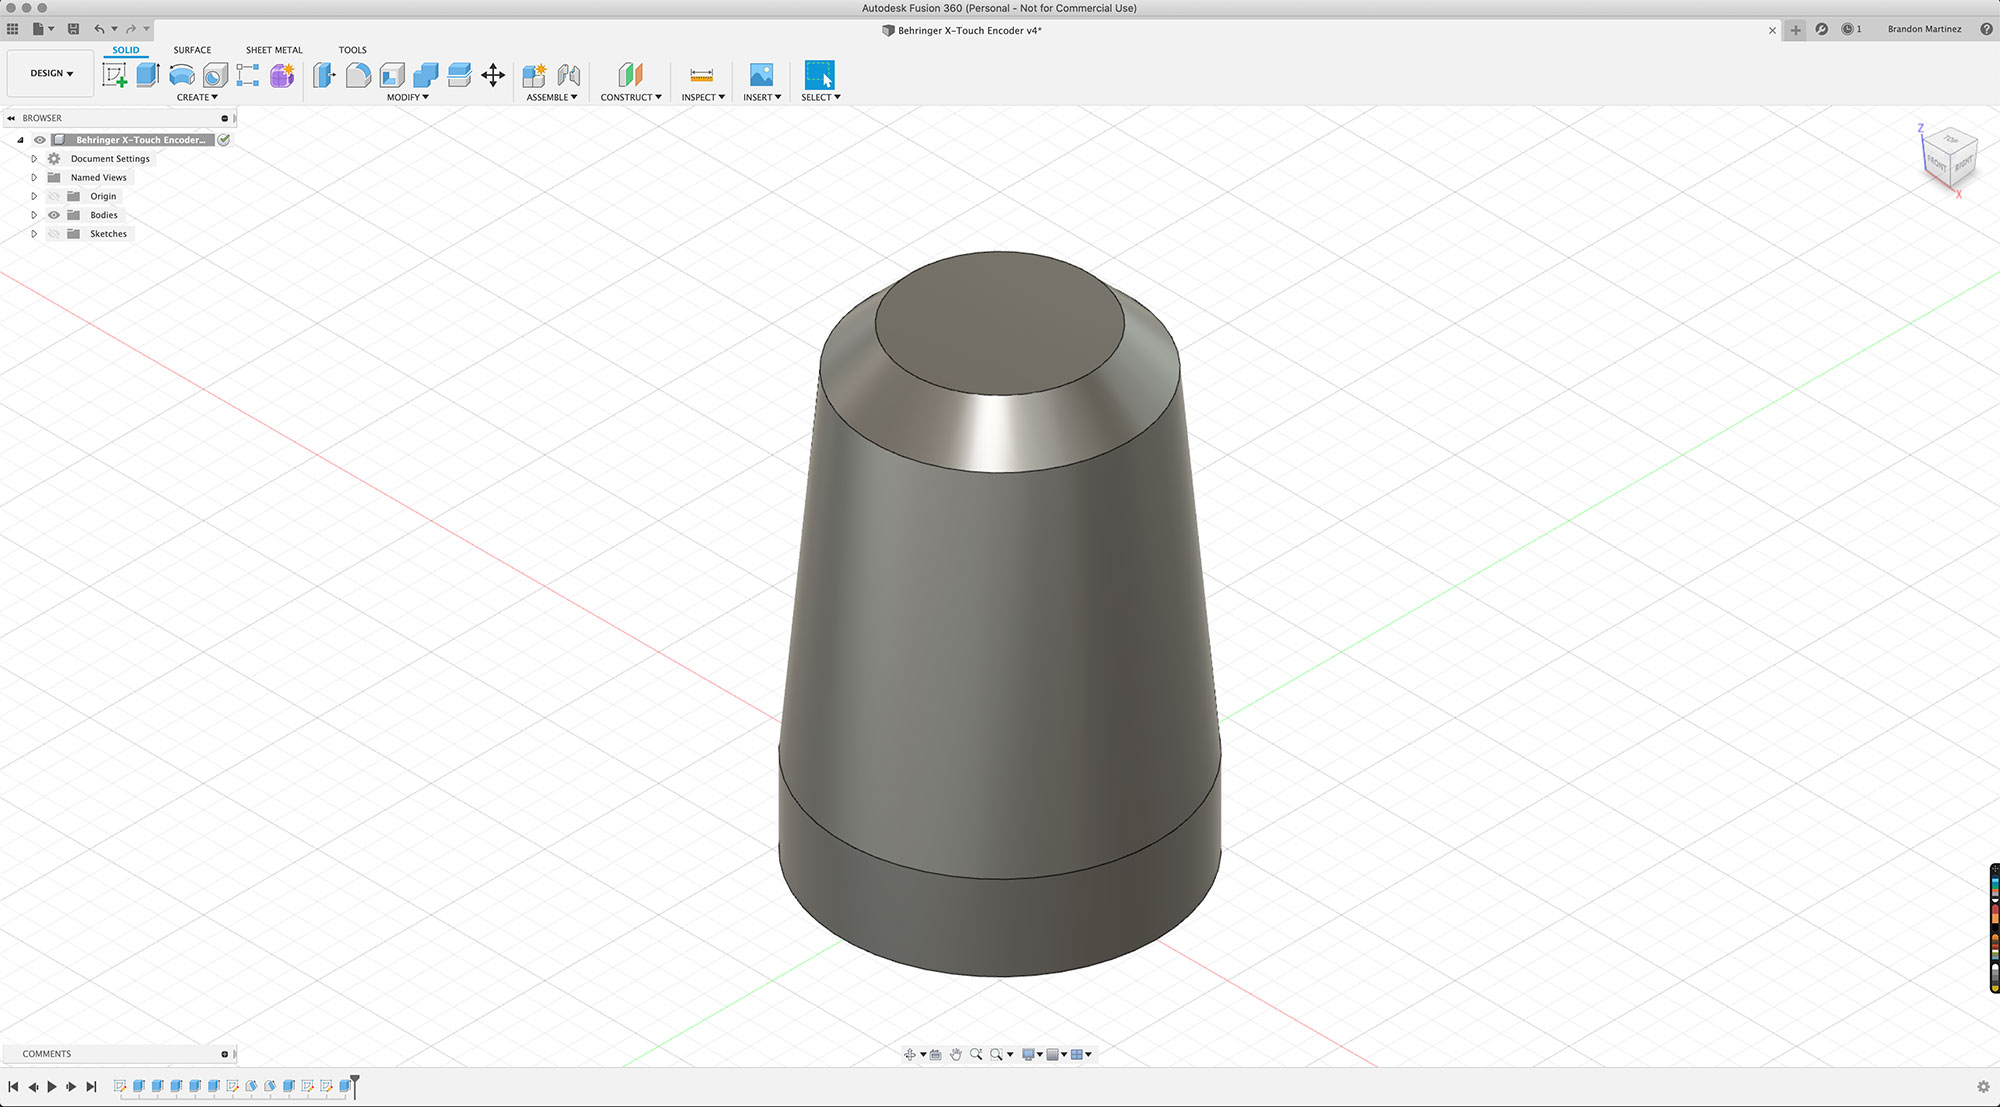
After printing, I found that while it fit on the encoder snuggly, it actually sat too deep and didn't allow me to use the button-press feature of the encoder. Here you can see that it sinks in too far. You'll also notice the encoder is actually bent into the X-Touch; I popped that out later:
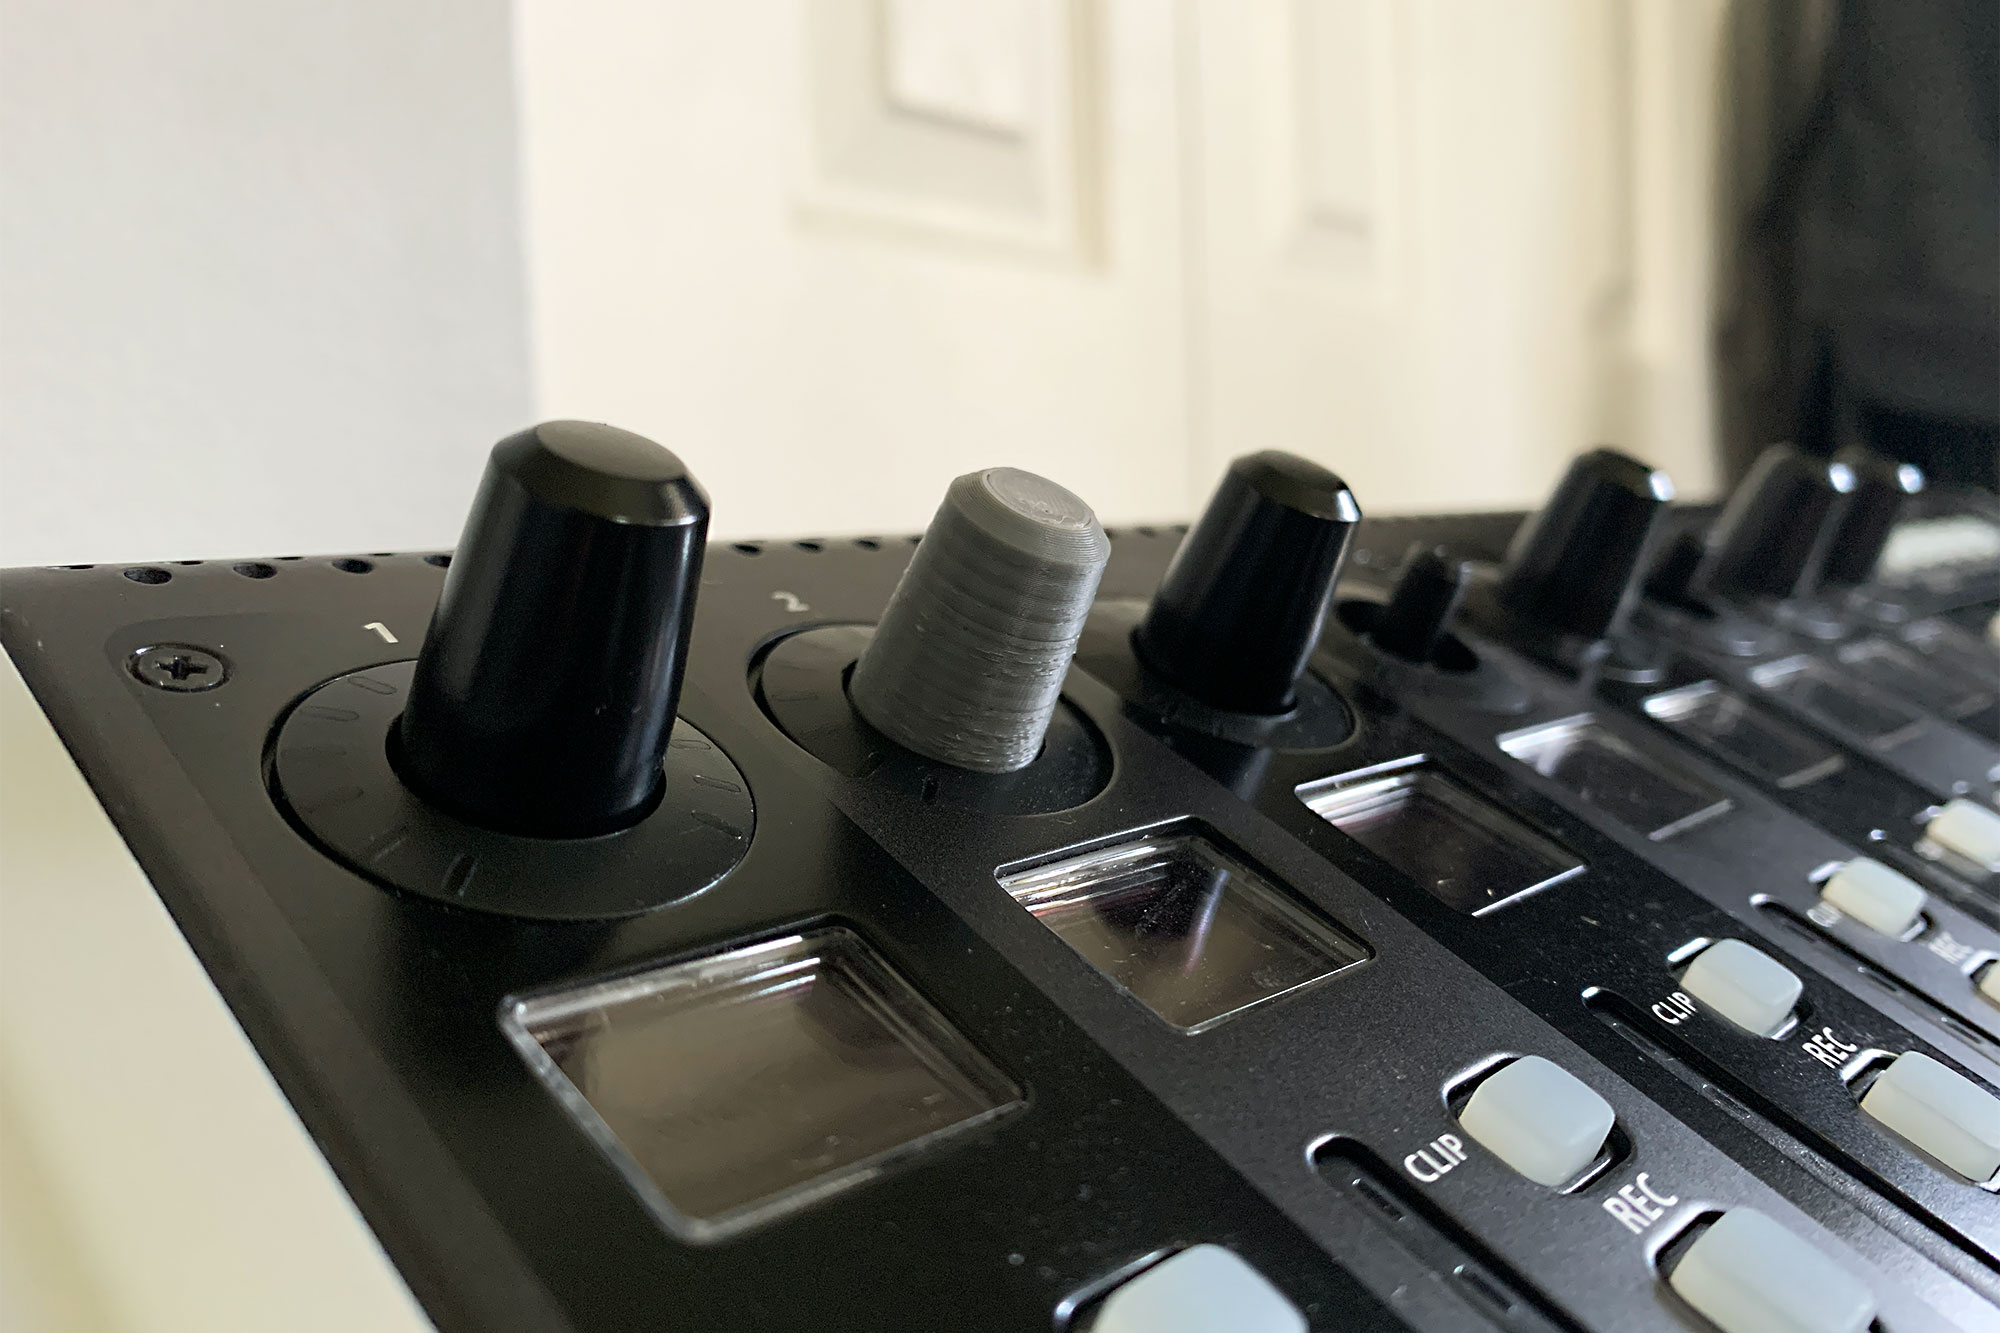
I had to make a few more revisions to get it to sit just right:
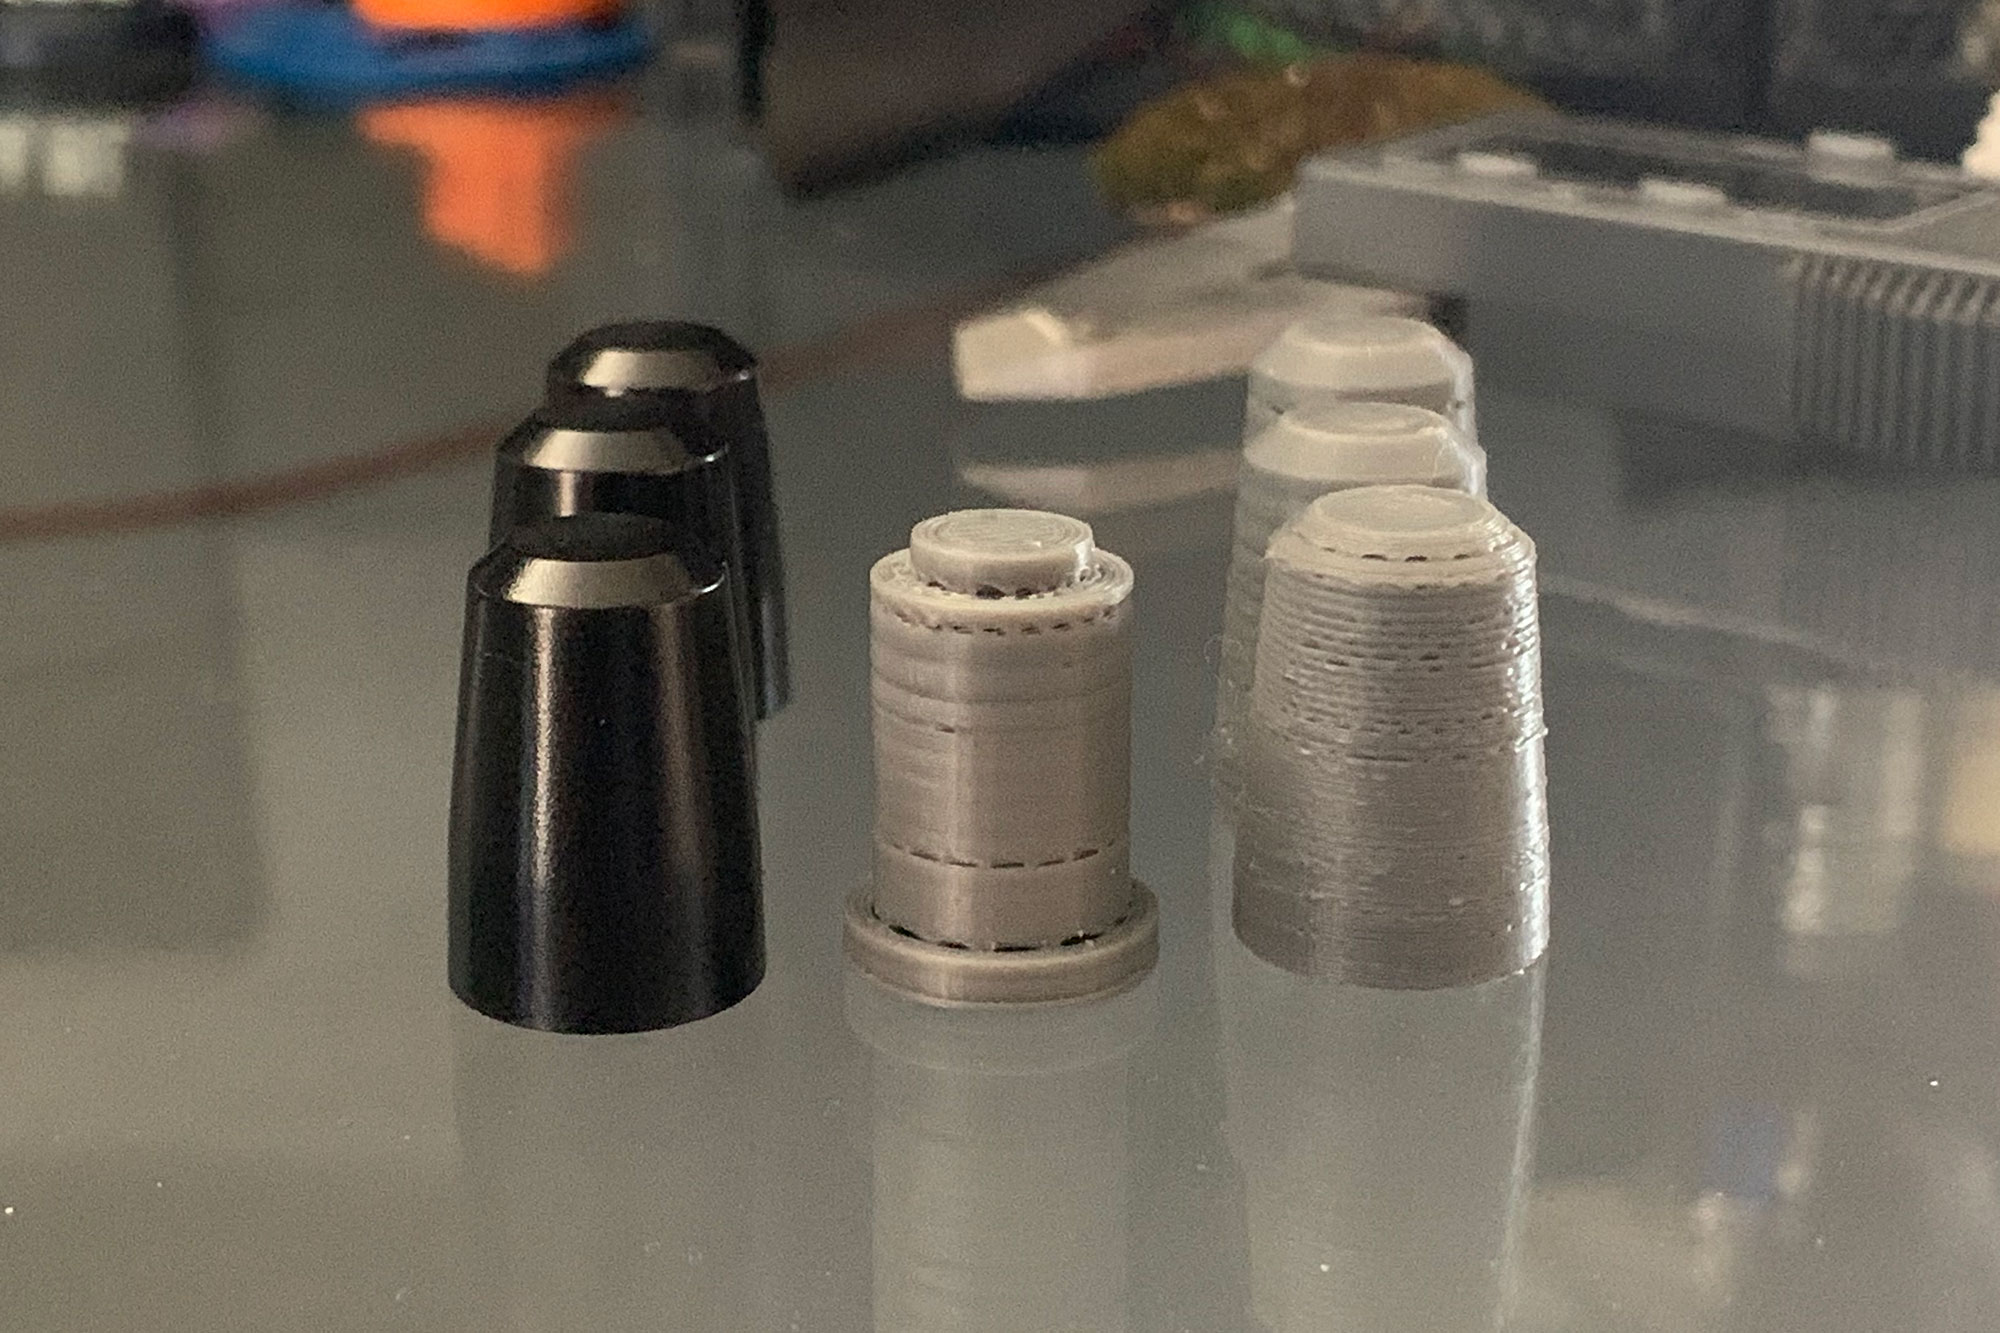
When I was happy with the design, I printed a full set to replace the caps that were broken. I think they turned out quite well! I alternated the caps just for visual flair.

While I would have rather not had my X-Touch break at all, this was a neat project to show the power of 3D printing at home. I had a need, put a design and solution together, and was able to create a usable replacement.
Now, I didn't go through the work of "finishing" these caps, as I do have a support ticket to get replacements. I could print these in black ABS filament and go through a finishing process to make them look nearly identical. However, this works functionally well and I'm actually quite happy with the appearance of them.
It's awesome to have a practical use for the 3D printer!
Also, If anyone else is looking for a replacement Behringer X-Touch encoder cap to print, here is an STL file you can use to print your own.