Serve WordPress Cache files from Azure's CDN Service
Serve WordPress Cache files from Azure's CDN Service
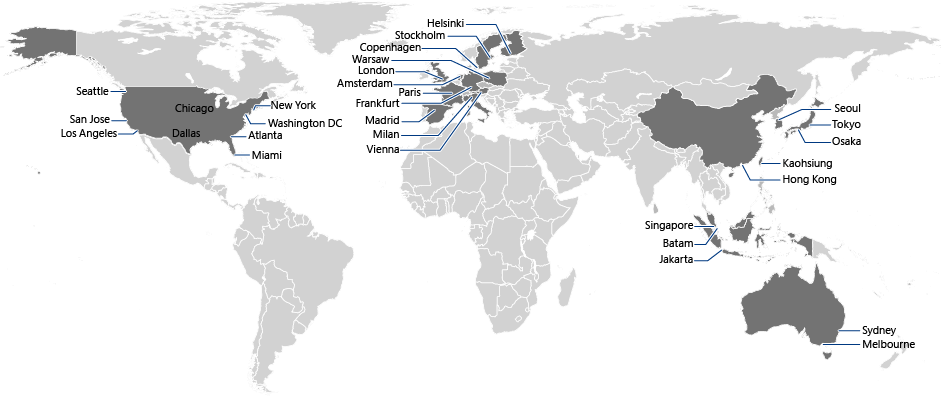
If you're running your WordPress site on Microsoft Azure, you may want to consider utilizing the CDN service that is available. By using the CDN service, you can host your static content such as images, scripts, and other theme components from the 31 different point of presence locations provided.
When you're trying to scale and provide content around the globe, the CDN provides a cost effective way to send static content to more users.
Before configuring WordPress, a few assumptions are made:
- You're running the latest version of WordPress
- The site is hosted as an Azure Website/web app (shared tier or higher)
- WP Super Cache is installed and configured (including a functioning web.config)
Create an Azure CDN Service
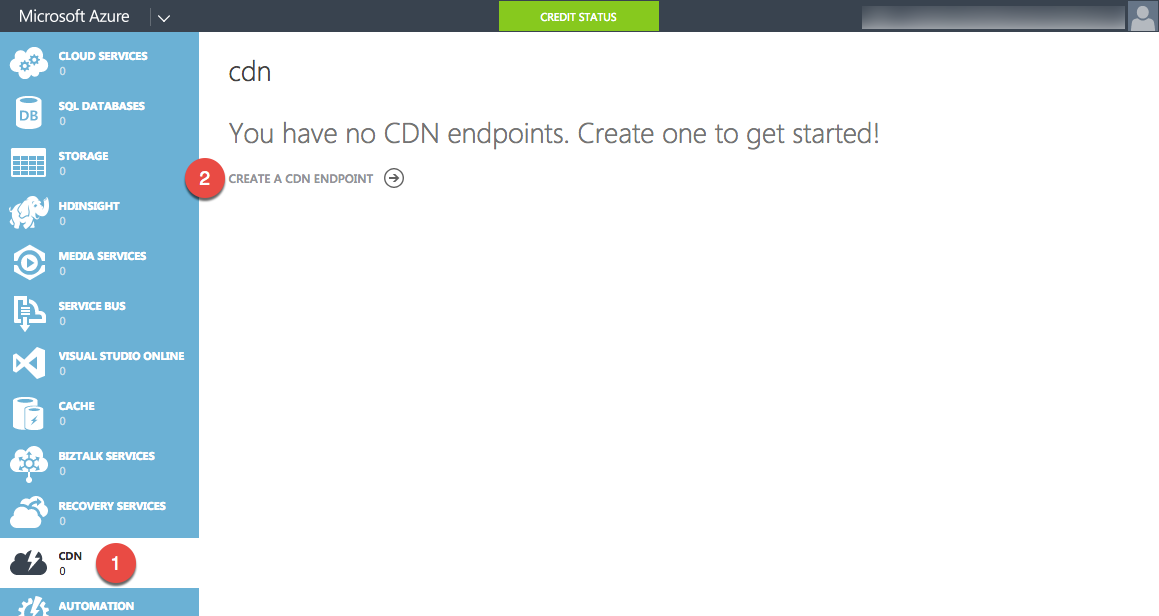
From the old Azure Management Portal:
- Choose CDN from the left navigation menu.
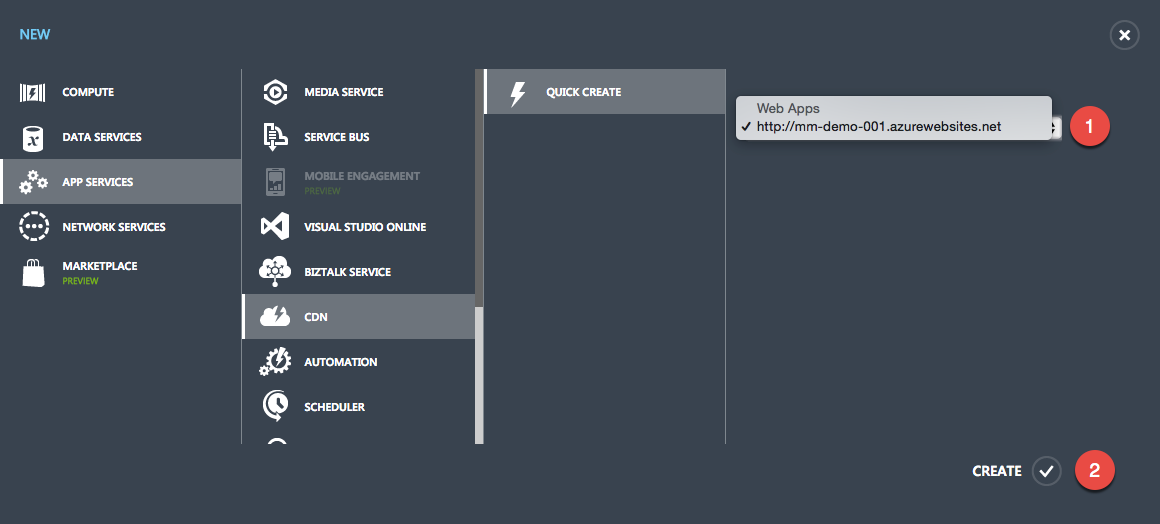
- Create a CDN Endpoint
- Choose the web app you want the CDN to mirror:
- Click into the newly-created CDN service to view more information.
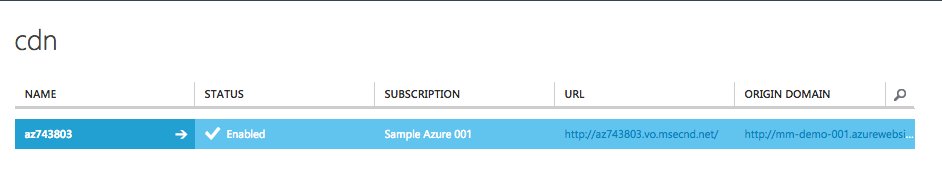
- Make note of the CDN Endpoint address; we'll be using this to configure our
proxy service.
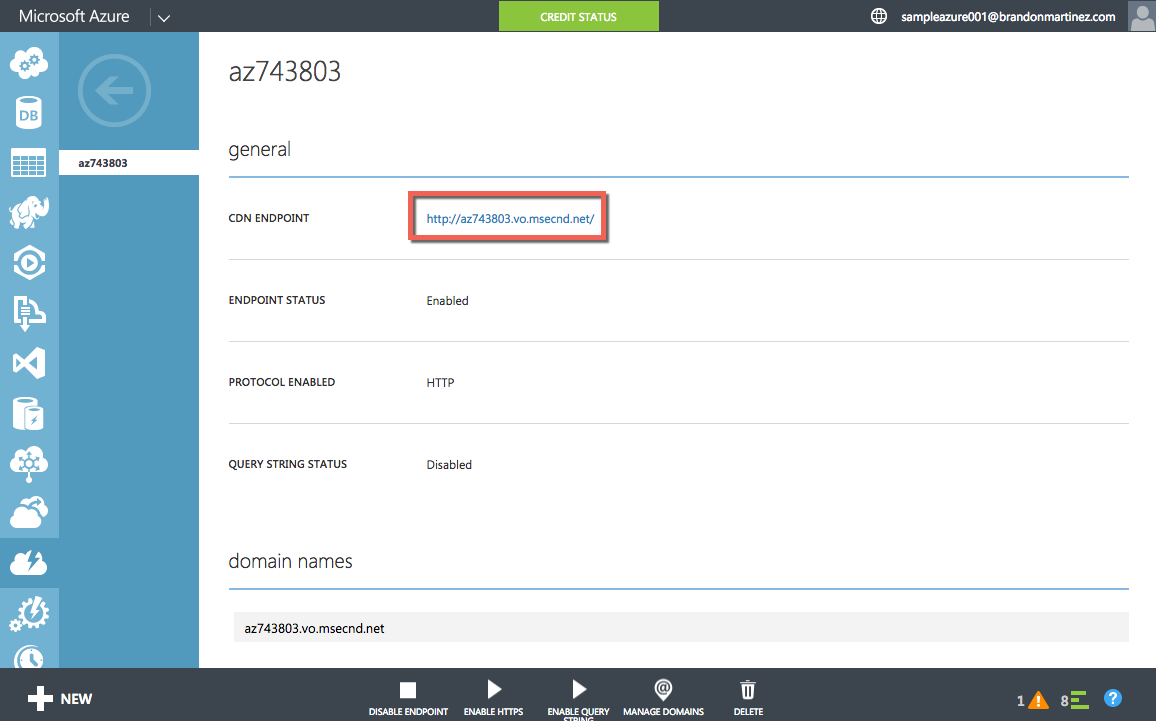
Something to keep in mind: it may take some a few hours for all of your files to be propagated to the CDN service.
Note: if you want to optionally map a CNAME to this service so that you could have an address like cdn.mydomain.com, you can do that through this management portal area. When you set a CNAME, this also can take a few hours to propagate.
Configure WP Super Cache
CDN Rewriting
This is probably the most important part of this tutorial: this is what actually ties your statically-rendered, cached files to referencing the new Azure CDN for static content.
- Open WP Super Cache Settings: Settings -> WP Super Cache
- Go to the CDN tab
- Check Enable CDN Support
- Off-site URL: put in your Azure CDN URL that you saved from above
- Include directories: you can leave this as the default ("wp-content,wp-includes"), or as you learn of specific caching areas you can expand this
- Exclude if substring: defaults to just ".php", but feel free to add any other extensions that you don't want to serve off the CDN
- Additional CNAMES: if you'd like to include additional CDN endpoints, or just wrap multiple CNAMEs around a single CDN, you can put that configuration here
- Select Save Changes
Note: if you're running a multi-site, especially one that utilizes multiple domains, you'll need to go to each domain's dashboard and configure these settings.
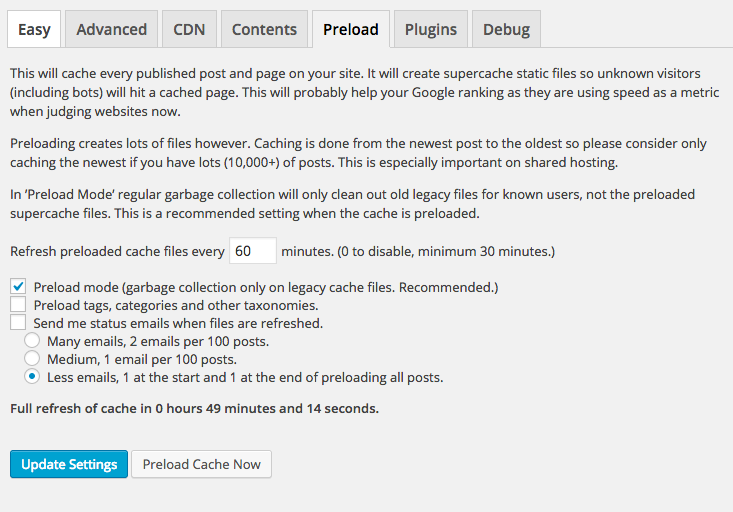
Preloading
WP Super Cache needs to be configured for preload mode. Preload mode will cache every published post and page on the site, creating statically-rendered pages for non-authenticated users. This will give us content to serve through the CDN.
Doing this is easy; from the WordPress admin dashboard:
- Open WP Super Cache Settings: Settings -> WP Super Cache
- Go to the preload tab
- Check the Preload mode (garbage collection only on legacy cache files. Recommended.) option.
- Optionally check any other settings you wish to include.
- Choose a preload cache time; anything 30 minutes or longer
- Click Update Settings
- Click Preload Cache Now
Clear Current Cache
In the event that some cache was generated, you may want to Delete Cache on All Blogs under the Contents panel.
Test!
You should be all set; be sure to test your site to verify everything is hitting your proxy properly. Keep in mind it may take a few hours for all of your site content to propagate to your proxy; so you may have to flip back to the normal super cache behavior until the process is completed.
Additional References
- Azure Site Extensions
- Using Azure Web Site as a reverse proxy
- 10 URL Rewriting Tips and Tricks
- Use Azure CDN in Azure App Service